Setting up Multi-Factor Authentication with Microsoft
Setting up Multi-Factor Authentication with Microsoft
Logging in to the MyHarper Student Portal now uses Microsoft to sign in. Signing in
to MyHarper for the first time will require you to set up multi-factor authentication
with Microsoft.
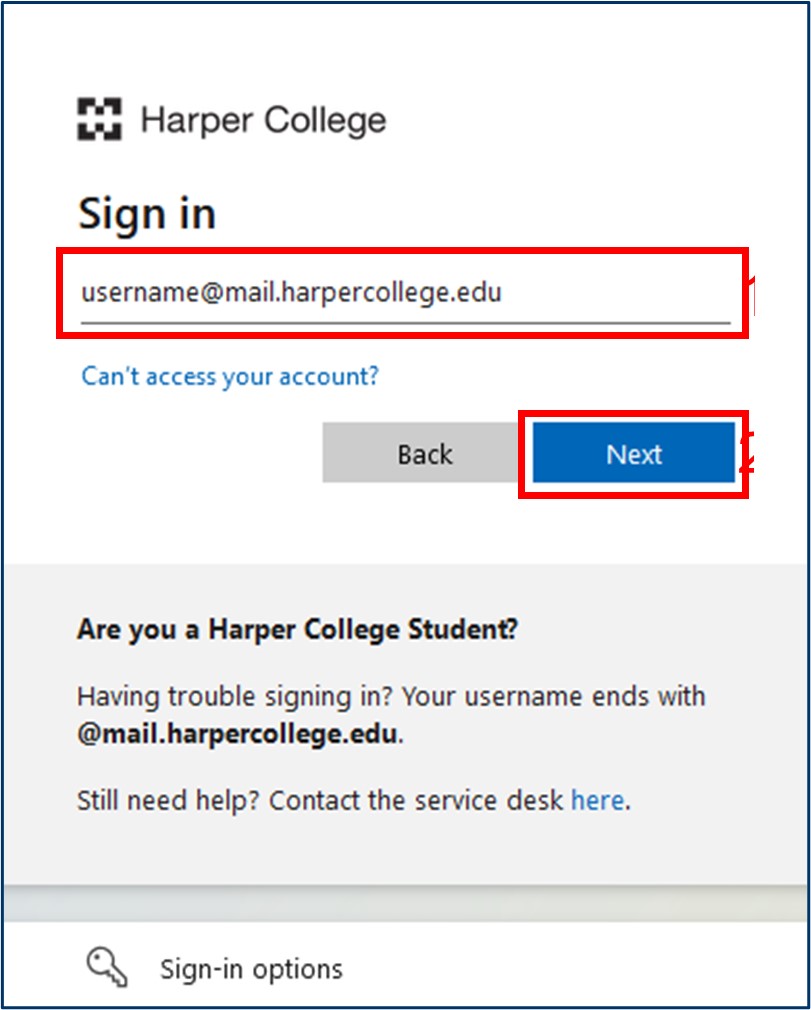
Enter your Harper College email address in the following window (Figure 1-1). Your
email address is your username followed by @mail.harpercollege.edu
Click Next (Figure 1-1).
Figure 1: MyHarper Portal - sign in page
Enter the password for your Harper College email (Figure 2-1). If you forgot your password or did not
set one up, click Forgot my password or navigate to aka.ms/sspr and follow the steps there.
Click Sign in (Figure 2-2).
Figure 2: MyHarper Portal - Enter password page
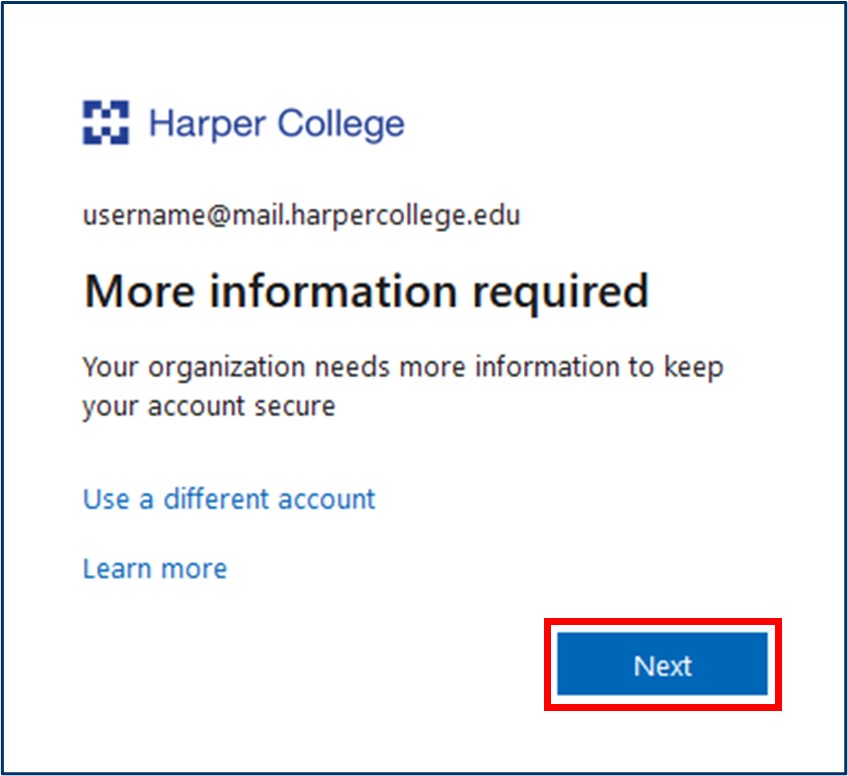
Click Next on the More information required page (Figure 3). From here, you will have options
to set up your multi-factor authentication with the Microsoft Authenticator app and/or your mobile device.
Figure 3: More information required
Setting up Microsoft Authenticator
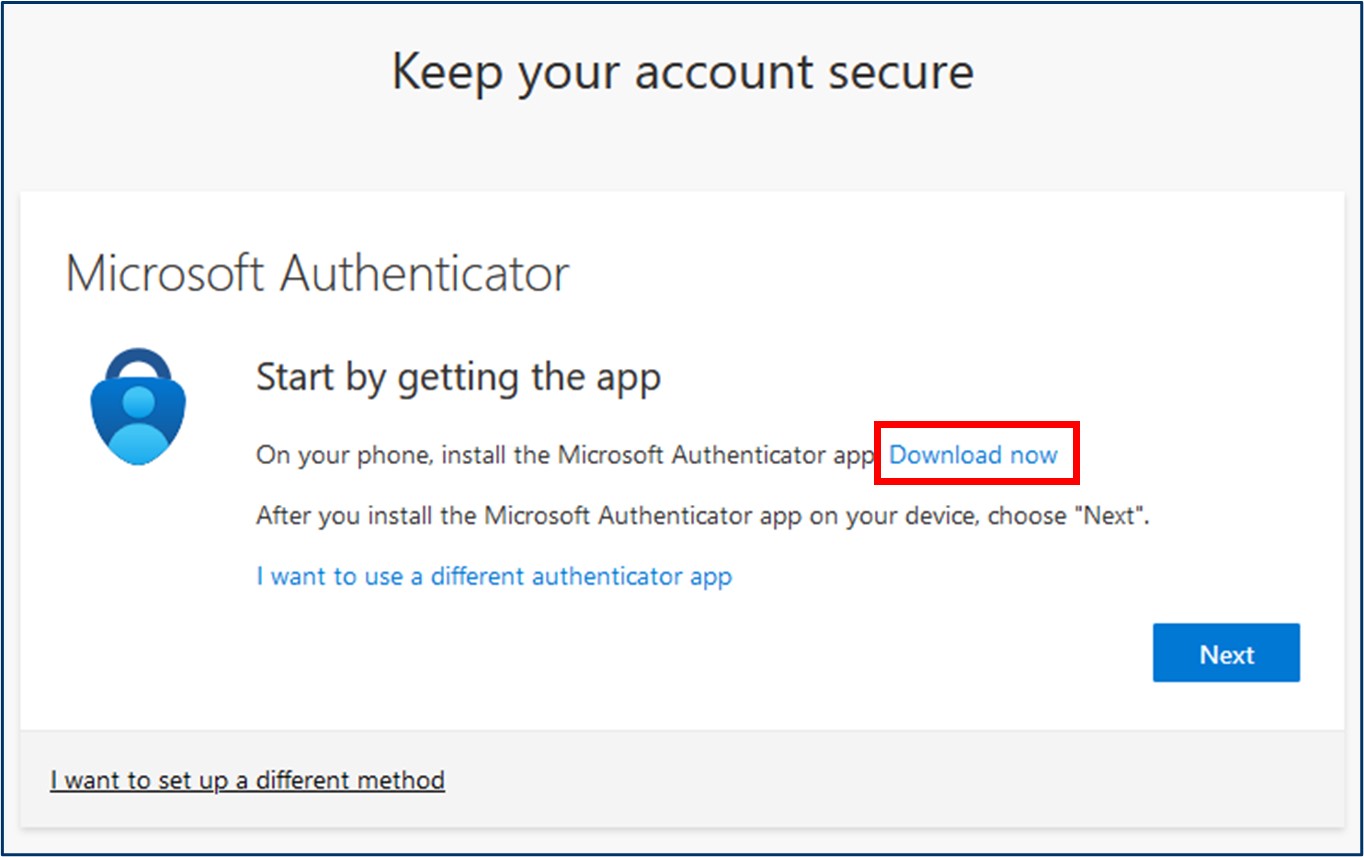
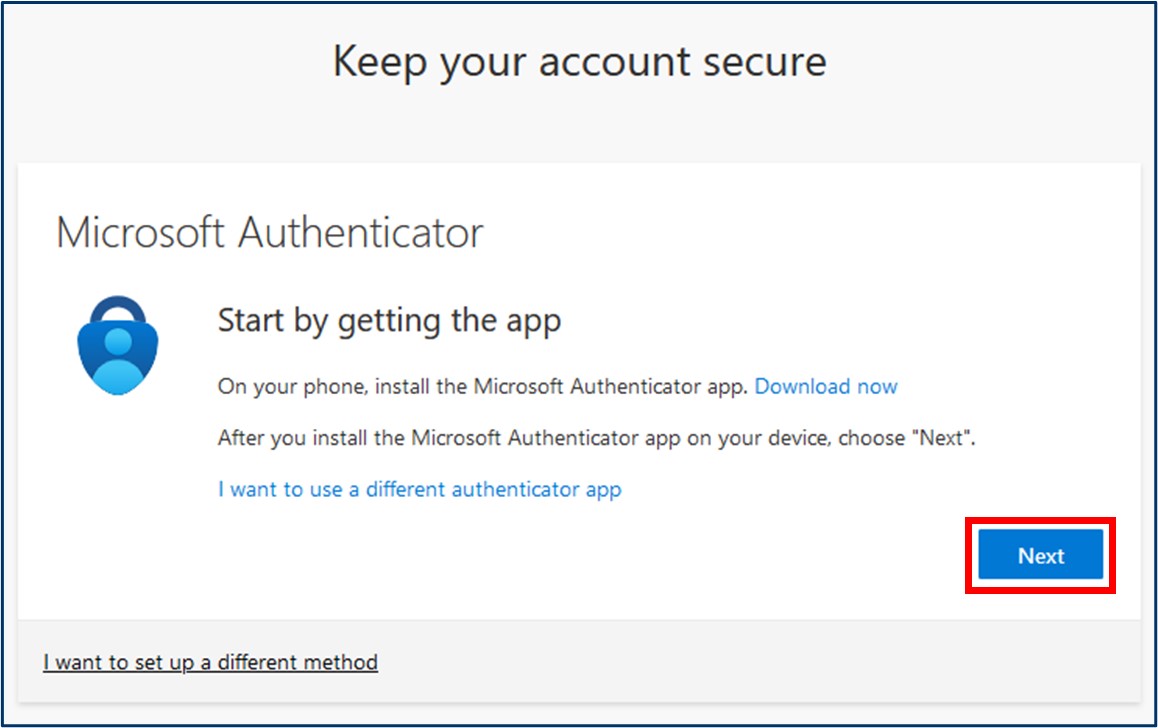
You will be prompted to set up multi-factor authentication. Click Download now to open QR codes to download the Microsoft Authenticator app (Figure 4).
Figure 4: Microsoft Authenticator - Download now link
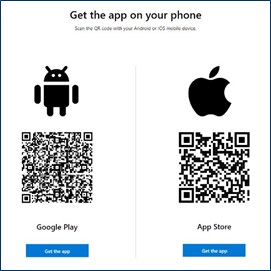
A new tab will open with Get the app on your phone. Scan the QR code with your Android
or iOS device’s camera (Figure 5).
Figure 5: QR code for Microsoft Authenticator download
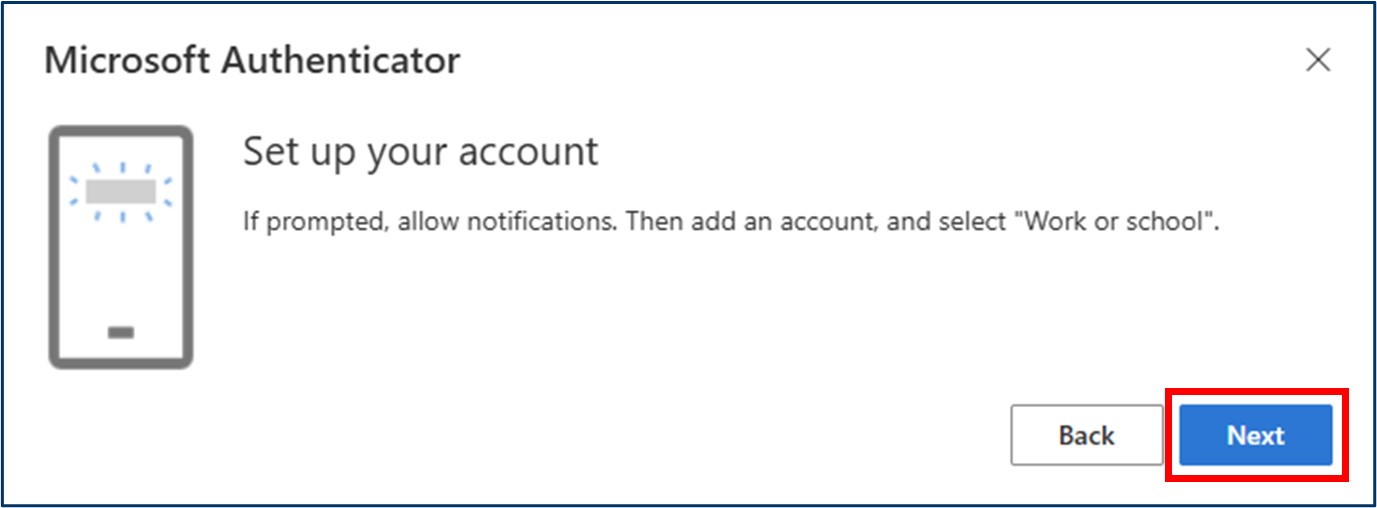
After installing the Microsoft Authenticator app on your mobile device, go back to the previous browser tab seen in Figure 4.
Click Next in the Set up your account window (Figure 6).
Figure 6: Microsoft Authenticator – Continuing set up
Click Next on the Set up your account screen (Figure 7).
Figure 7: Set up your account
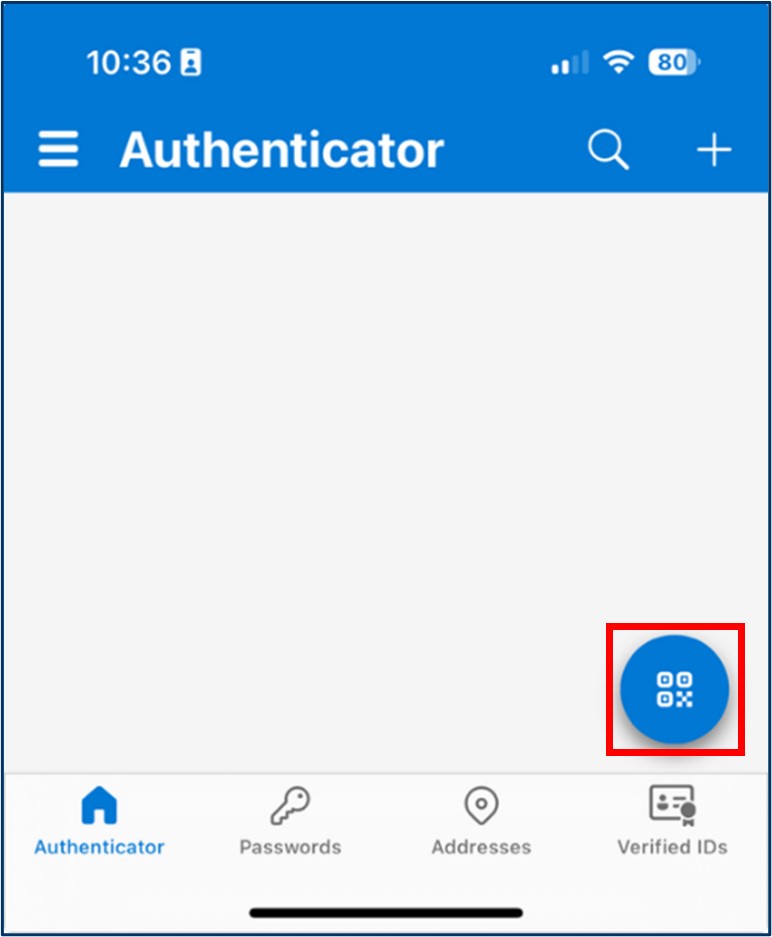
On your mobile device, launch Microsoft Authenticator and select Scan QR code (Figure 8).
Figure 8: Microsoft Authenticator app - Scan QR code
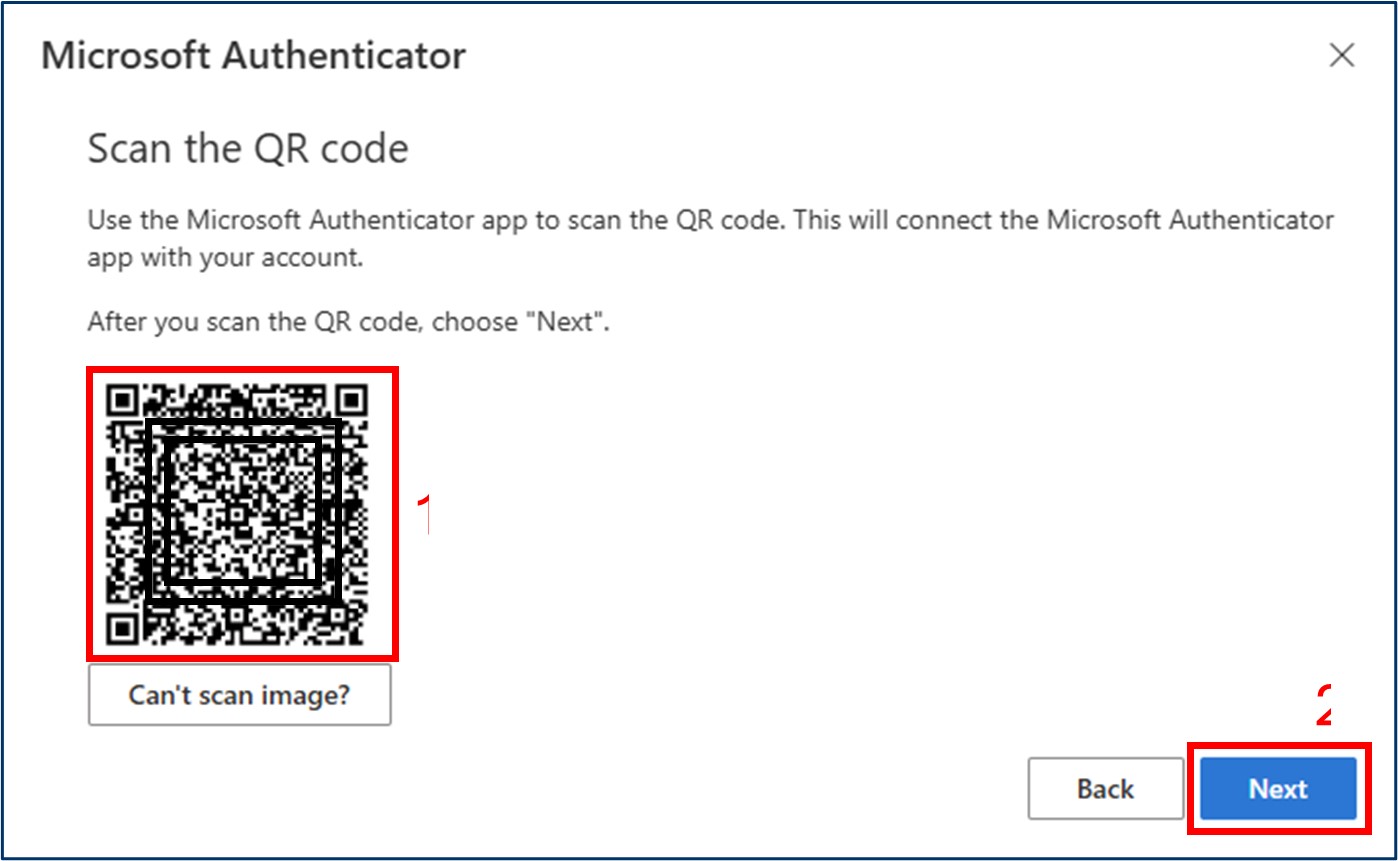
Use your mobile device to scan the QR code on the computer screen to link your Microsoft Authenticator app to your Harper College account (Figure 9-1).
Click Next after scanning the QR code (Figure 9-2).
Figure 9: Scan QR code with phone
The Microsoft Authenticator app will test if it is connected with your Harper College email. You will receive
a notification from the app on your mobile device to approve the sign in.
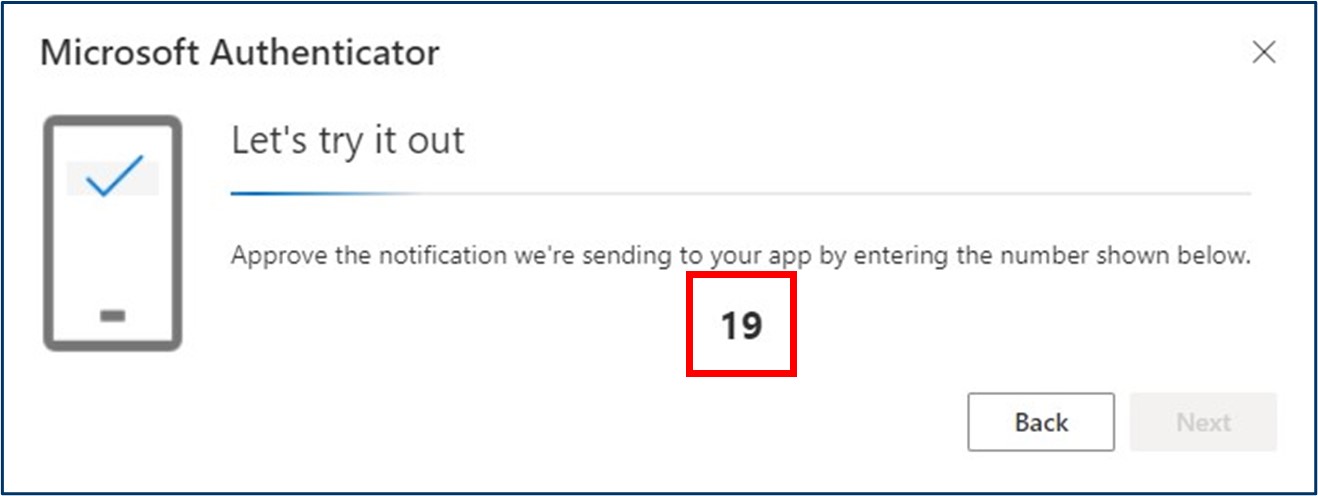
A number will appear on the browser (Figure 10).
Figure 10: Number on browser
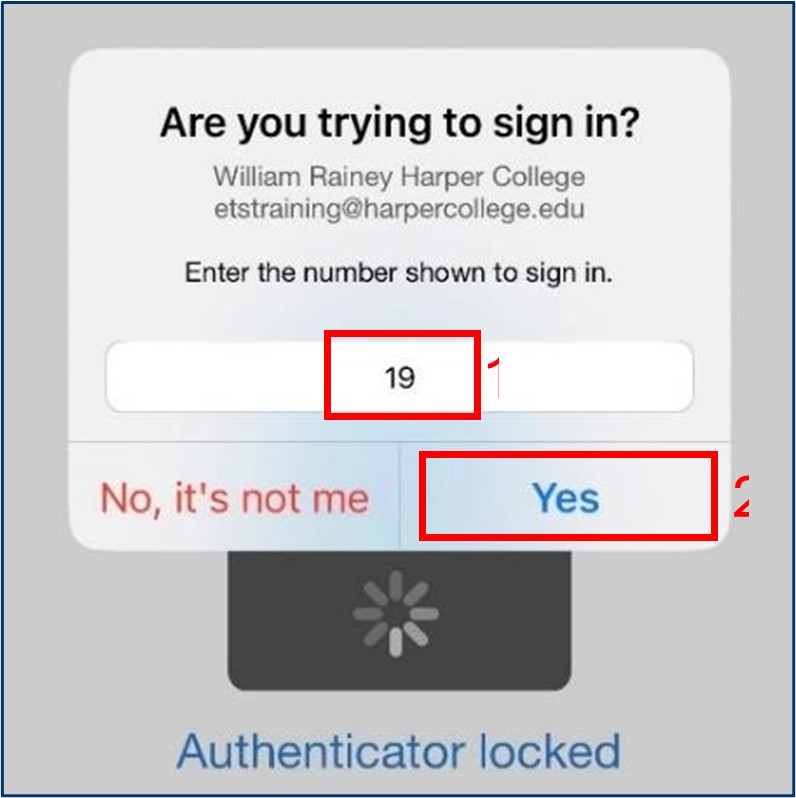
Enter the number from the previous step into the Microsoft Authenticator app on your mobile device (Figure 11-1).
Tap Yes on your mobile device to verify you can use the Microsoft Authenticator app (Figure 11-2).
Figure 11: Entering number seen on computer into app
Once successful, Notification approved will show. Click Next to access the MyHarper Portal (Figure 12).
Figure 12: Microsoft Authenticator confirmation
Setting up Phone as Authenticator
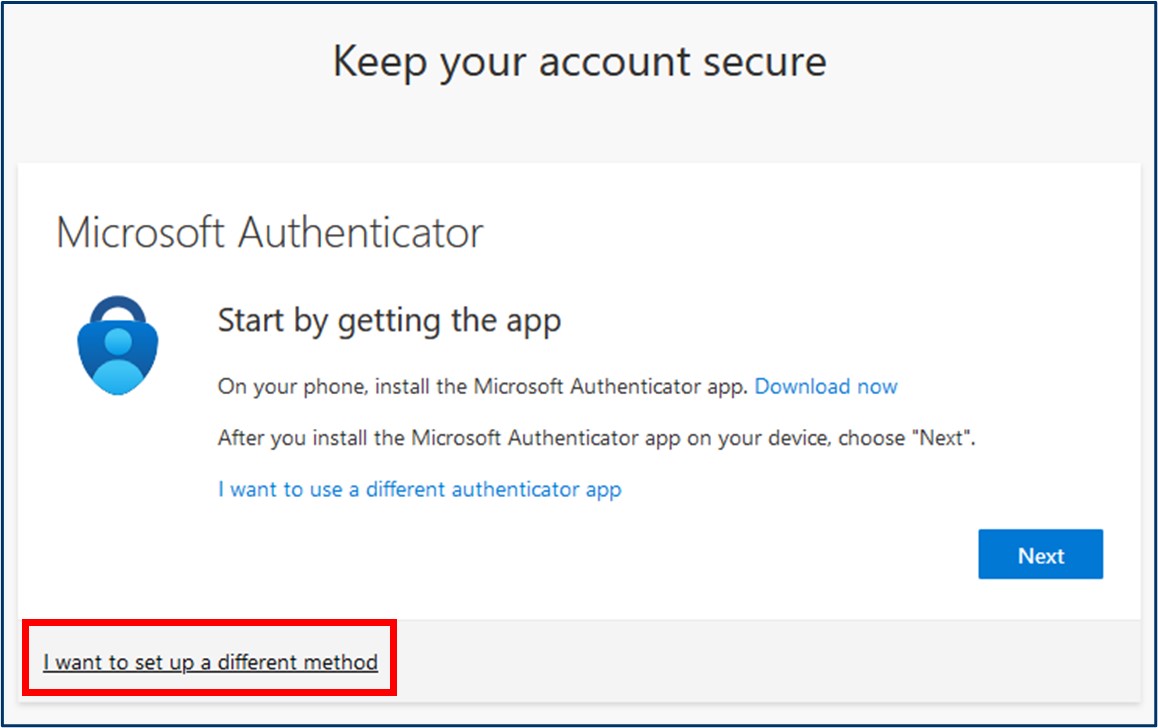
You will be prompted to set up multi-factor authentication. Click I want to set up a different method (Figure 13).
Figure 13: Set up a different method
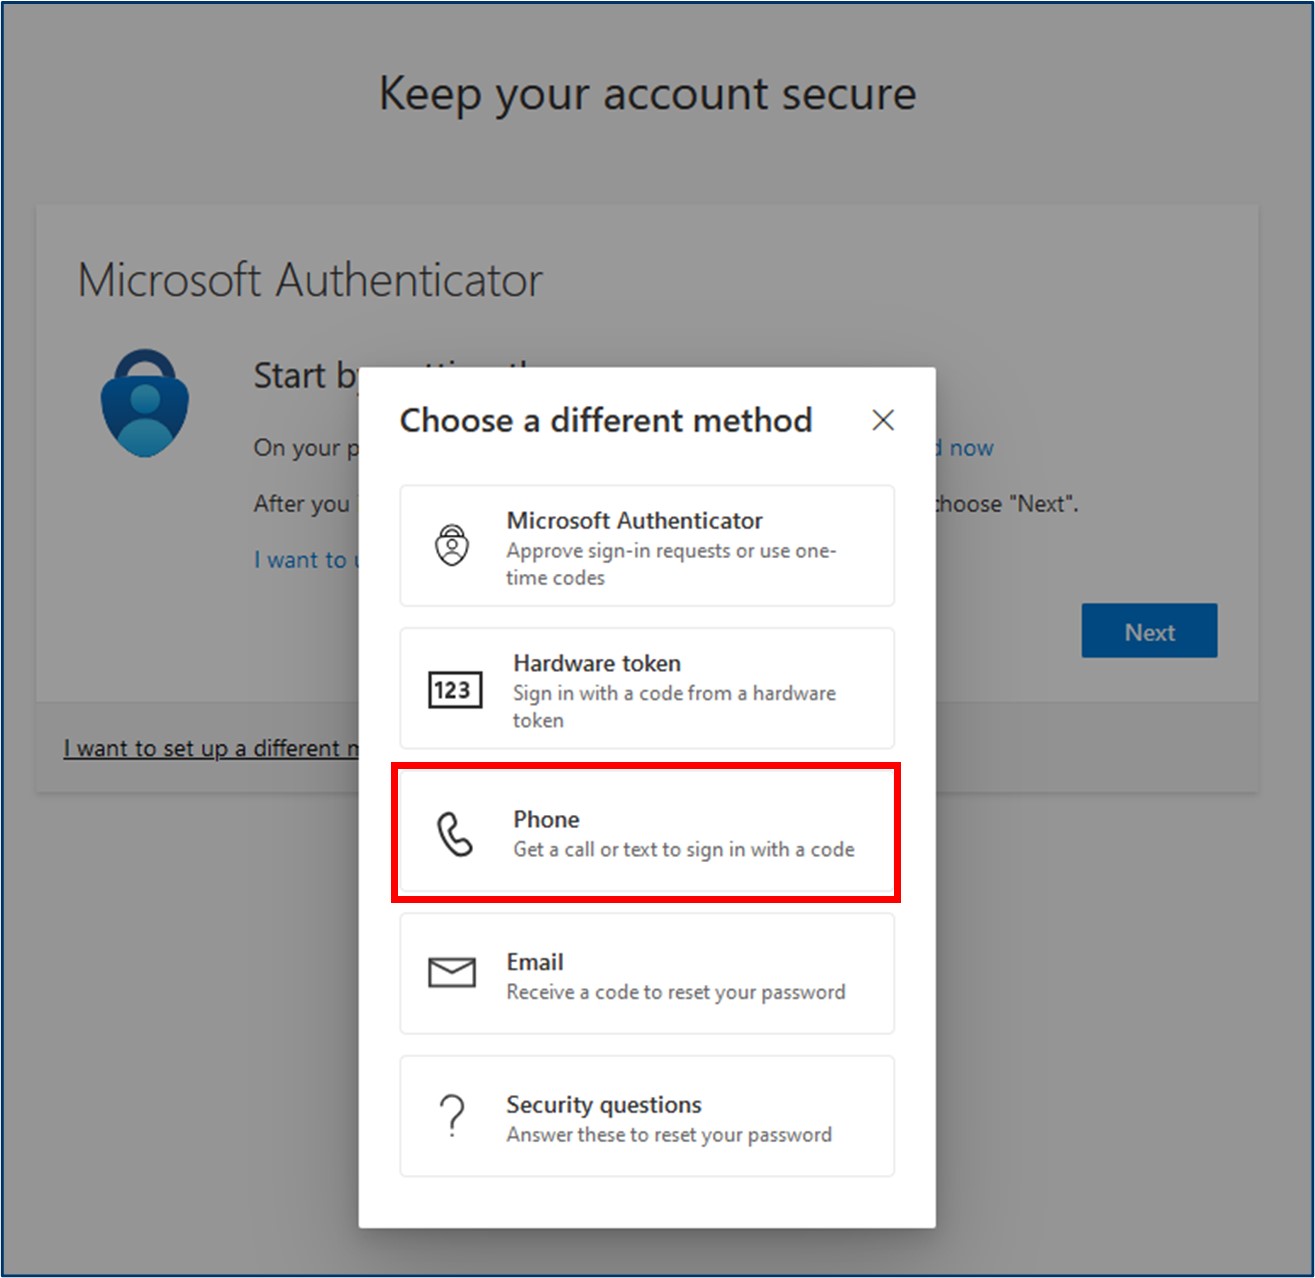
Click Phone in the Choose a different method window (Figure 14).
Figure 14: Choose a different method – Phone
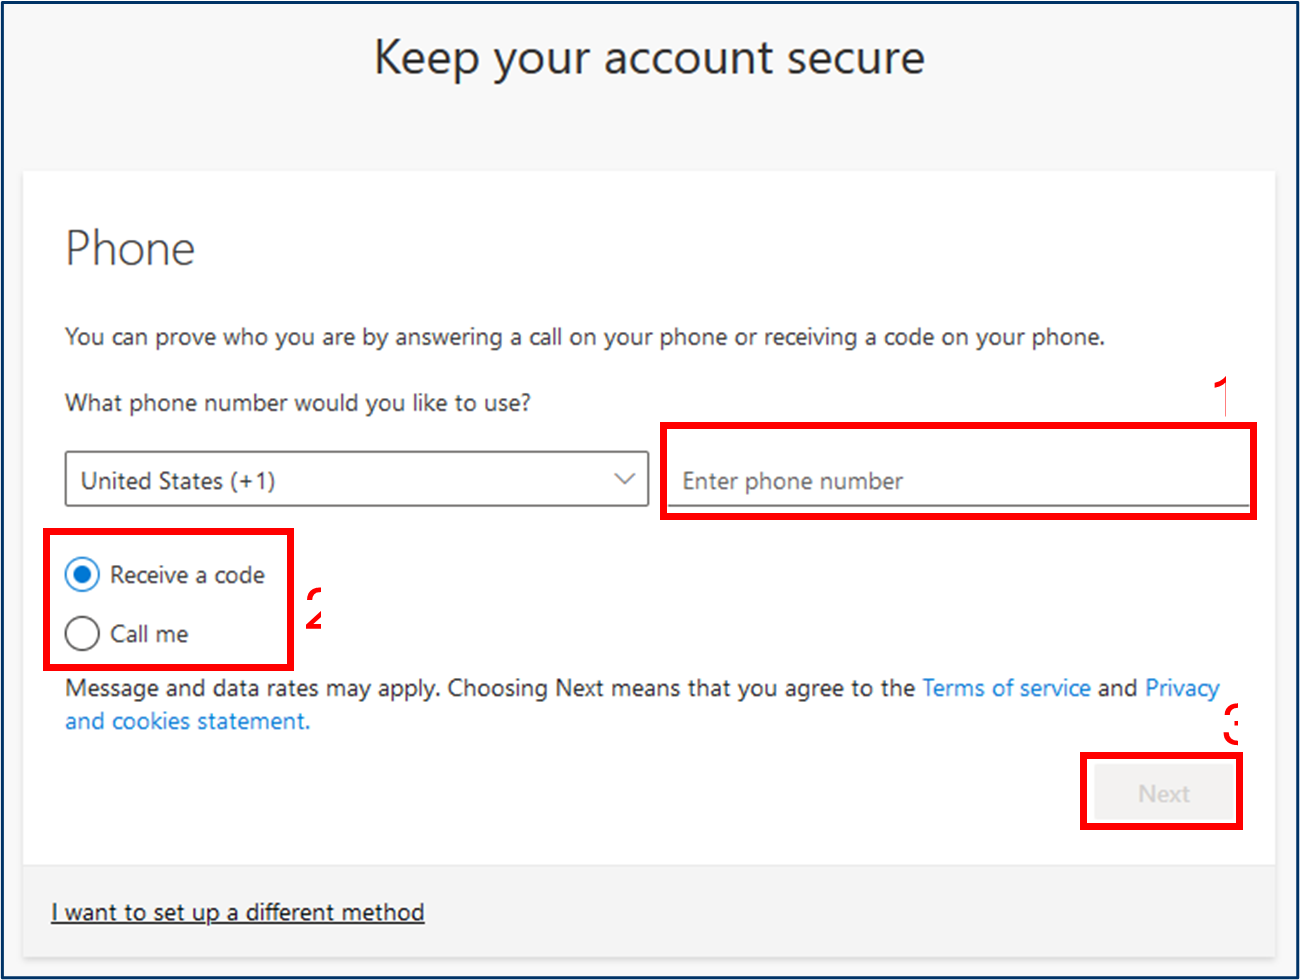
Enter your phone number (Figure 15-1).
Select whether you would like to receive the authentication code via text message
or phone call (Figure 15-2).
Click Next (Figure 15-3).
Figure 15: Enter phone number and selecting method
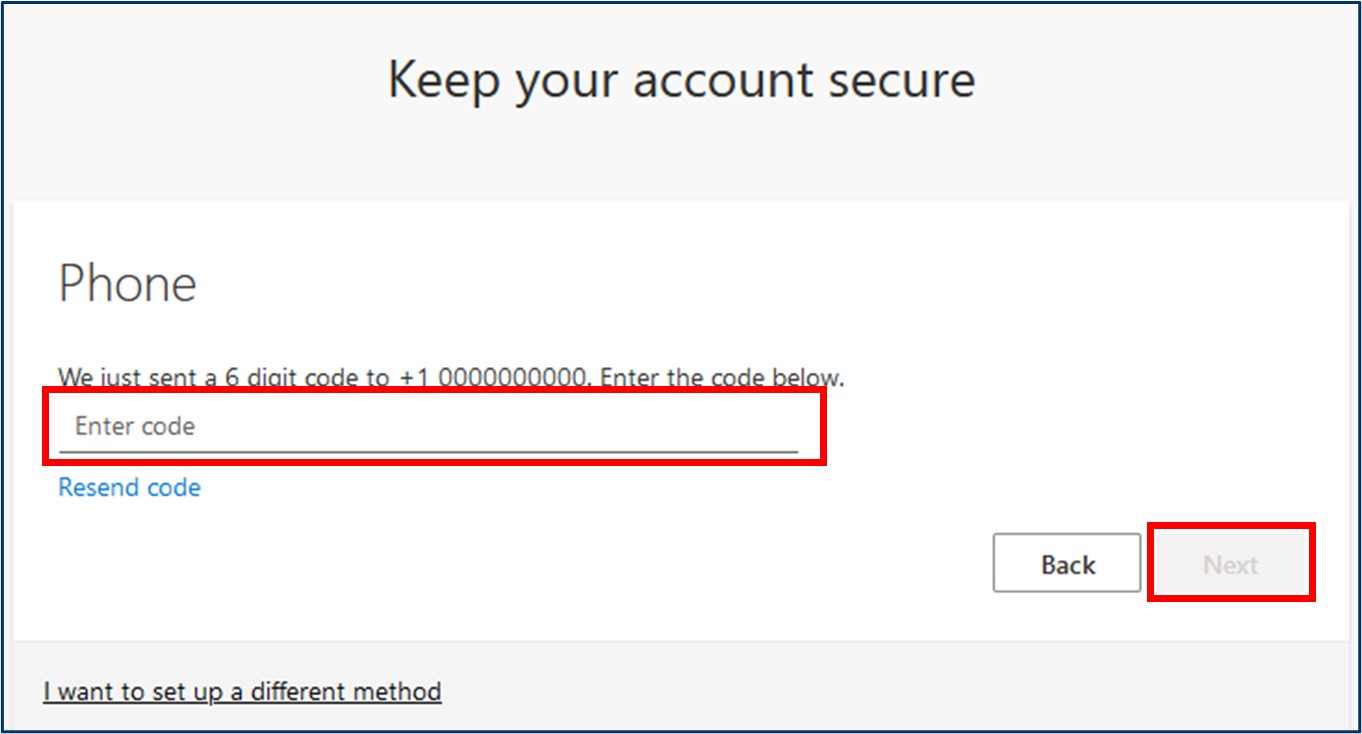
A test will be sent to the phone number entered.
If you selected Receive a code, a 6-digit number will be texted to the phone number entered. Enter the number in
the following screen and click Next (Figure 16).
Figure 16: Entering the code sent to your phone
If you select Call me, a call will be sent to the phone number entered. Confirm the sign in by following
the call’s instructions.
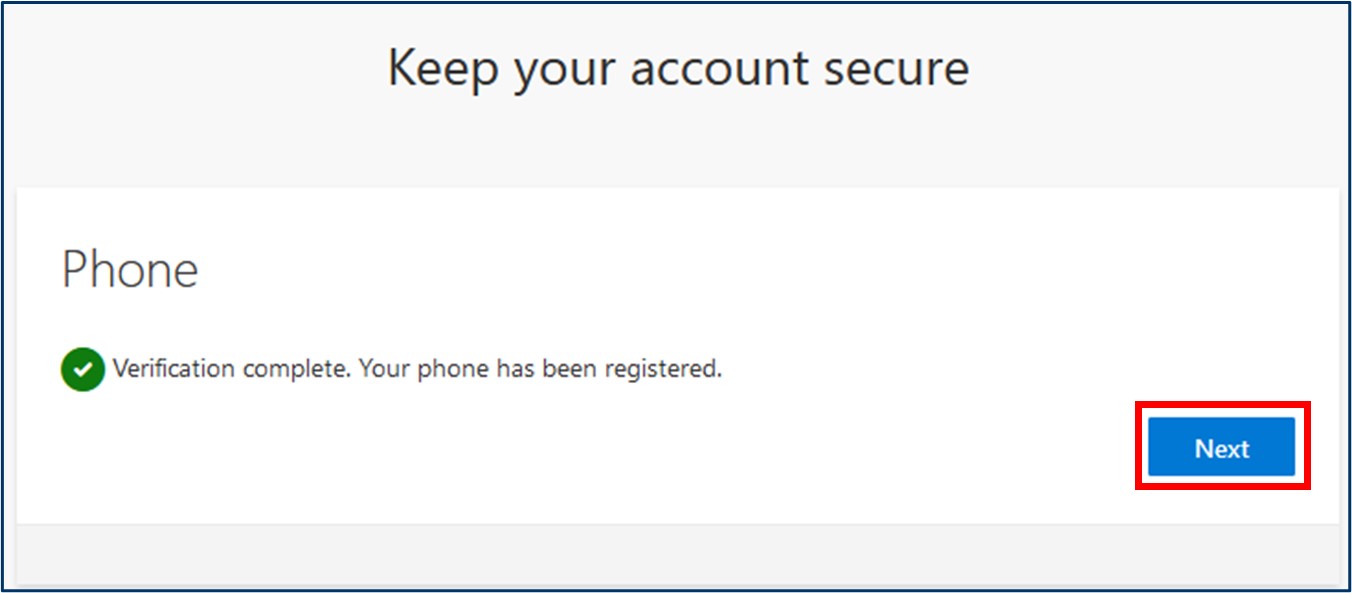
Once successful, a Verification complete will show. Click Next to access the MyHarper Portal (Figure 17).
Figure 17: Verification complete for multi-factor authentication
Setting up Additional Multi-factor Authentication Methods
To set up additional multi-factor authentication for added security, follow these
steps: